Creating Custom & Dynamic Sections in Shopify: Easy Steps Guide

Shopify is a leading e-commerce platform that allows businesses to create visually appealing and functional online stores. One of its most powerful features is the ability to customize the storefront using sections. Whether you want to enhance your homepage, highlight featured products, or create unique promotional banners, Shopify sections offer the flexibility to design a store that meets your exact needs.
In this guide, we will walk you through how to build custom and dynamic sections in Shopify, helping you take full control over your store’s layout and design. By the end of this article, you will understand what Shopify sections are, the difference between static and dynamic sections, and how to create your own custom sections from scratch.
What are Shopify Sections?
Shopify sections are like building blocks for designing your online store. They allow you to customize different areas, such as the homepage, product pages, and slideshows, without needing to be a coding expert. These sections are flexible, so you can adjust them to fit your brand and the look you want for your store.
With Shopify sections, you can do things like:
- Add text and images
- Embed custom HTML
- Include advanced elements like videos and menus
Shopify makes customization easy through its theme editor, where you can see your changes in real time. This way, you don’t have to guess what the final design will look like, and you can quickly make adjustments.
Static vs. Dynamic Sections
Shopify sections are stored in the /sections folder of your theme. You’ll come across two types of sections:
- Static Sections: These appear on all pages of your store, like your header and footer, to maintain consistency across the website.
- Dynamic Sections: These are more flexible and can be added to different pages as needed. This gives you more control to design each page differently based on your needs.
Why Use Shopify Sections?
With the introduction of Online Store 2.0, sections are now even more flexible. You can add sections to any page, not just the homepage, giving you more freedom to design your store. Here are some key benefits of using sections:
- Better organization: Sections help break your store into clear and easy-to-manage parts.
- Easy customization: You don’t need to know how to code to make your store look the way you want.
- Personalized shopping experience: Customizing sections allows you to create a unique and engaging experience for your customers, which can lead to more sales.
How to Create a Custom Section in Shopify
Creating a custom section in Shopify involves modifying your theme’s code. Follow these steps carefully:
1. Access Your Theme’s Code
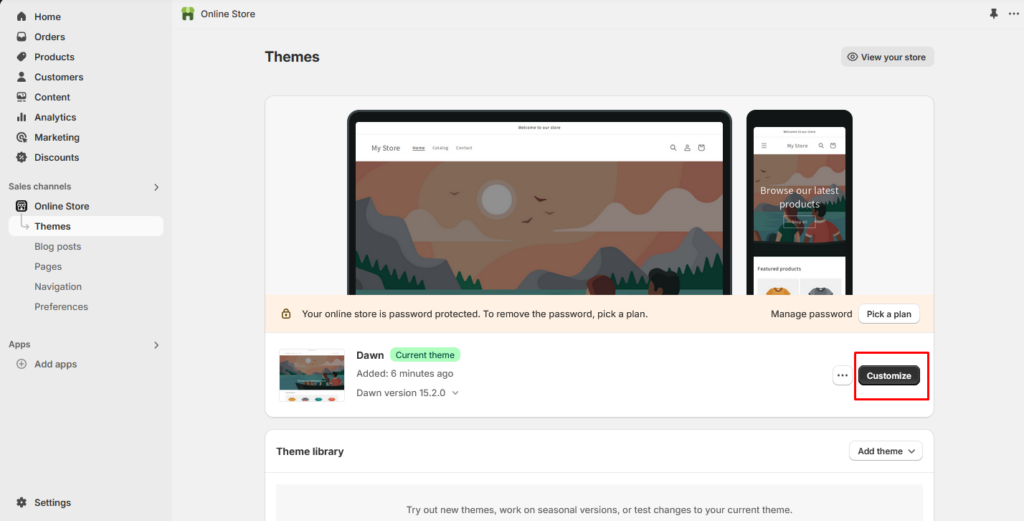
- Log in to your Shopify admin panel.
- Navigate to Online Store > Themes.
- Find your current theme and click Actions > Edit Code.
2. Create a New Section
In the left-hand sidebar, find the Sections directory.
- Click Add a New Section and name it something descriptive, such as custom-promo-banner.
- Shopify will generate a blank .liquid file for your section.
3. Add HTML Code
Now it’s time to add content to your section. Copy and paste this HTML code into your new section file:
<!-- Hello section starts -->
<section class="hello-section">
  <div class="wrap">
    <div class="hello-main-sec">
      <h1 class="section-title">Welcome to Our Store</h1>
      <h2 class="section-main-title">Glad to Have You Here!</h2>
      <p class="description">We offer the best products, just for you!</p>
    </div>
    <div class="read-btn">
      <button class="view-more-btn"><a href="#">Learn More</a></button>
    </div>
  </div>
</section>
<!-- Hello section ends -->
4. Define the Section’s Schema
Next, below your HTML code, you need to define how this section will show up in the theme editor. Add the following code:
{% schema %}
{
  "name": "Hello Section",
  "settings": [],
  "presets": [
    {
      "name": "Hello Section Layout",
      "category": "Custom Designs"
    }
  ]
}
{% endschema %}
This schema helps Shopify understand how to display and use your section. In this example, we’ve called it “Hello Section Layout” under the Custom Designs category.
5. Save and Test the Section
Once you’ve added the code, click Save. Now, to test the new section:
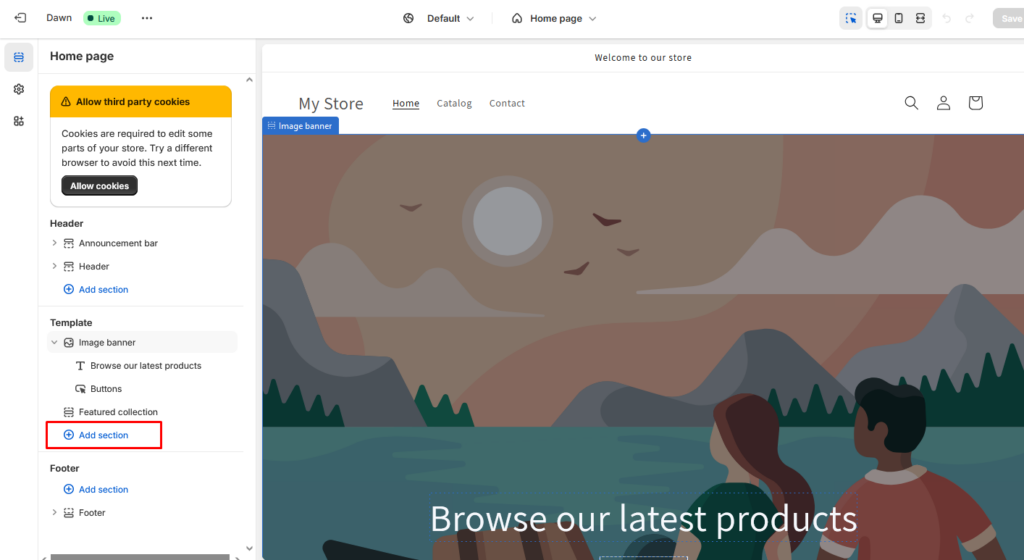
- Go back to your Shopify dashboard and click Customize next to your theme.
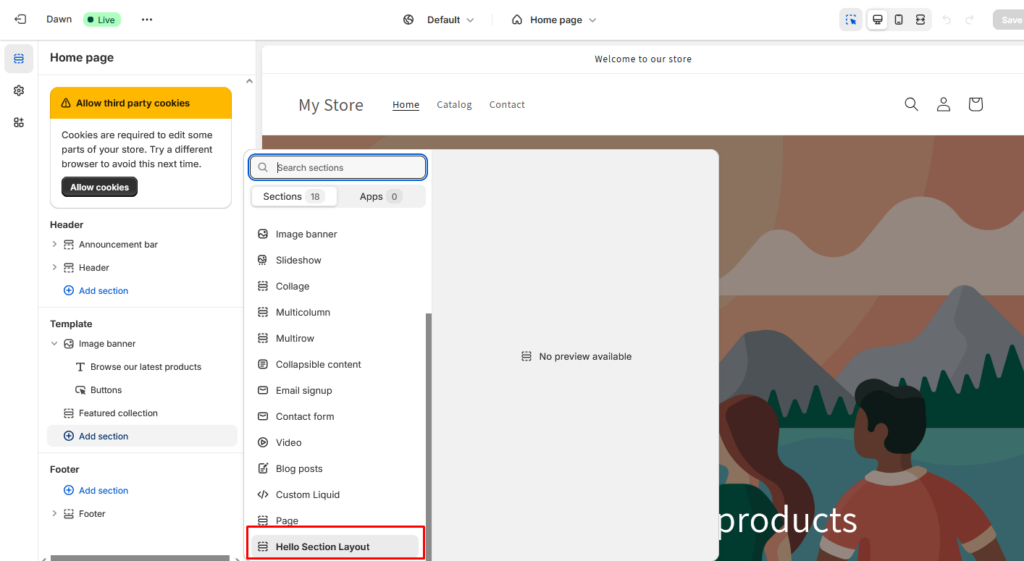
- In the theme editor, go to the Sections menu and click Add Section.
- Find the custom section you just created (it will appear under Custom Designs as “Hello Section Layout”).
- Select it, and you’ll see it appear on your homepage.
- If everything looks good, click Save and refresh your site to see the changes live!
How to Create a Dynamic Section in Shopify
Now that you’ve learned how to create a static section, let’s enhance it by making it dynamic. This will allow you to edit content like headings, descriptions, and button text directly from the Shopify theme editor.
1. Modify the Section HTML Code
Replace the static content with this dynamic version. This will allow you to change the content from the theme editor.
<!-- Hello section starts -->
<section class="hello-sec">
  <div class="wrap">
    <div class="hello-main-sec">
      {% if section.settings.section-heading != blank %}
        <h2 class="hello-section-title">{{ section.settings.section-heading }}</h2>
      {% endif %}
      {% if section.settings.section-main-heading != blank %}
        <h1 class="hello-section-main-title">{{ section.settings.section-main-heading }}</h1>
      {% endif %}
      {% if section.settings.description != blank %}
        <p class="description">{{ section.settings.description }}</p>
      {% endif %}
    </div>
    <div class="read-more-btn">
      {% if section.settings.button-text != blank %}
        <button class="view-more-btn">
          <a href="{{ section.settings.button-link }}">{{ section.settings.button-text }}</a>
        </button>
      {% endif %}
    </div>
  </div>
</section>
<!-- Hello section ends -->
2. Update the Schema for Dynamic Content
Next, you need to add a schema to tell Shopify how to show options for customization. This code should go below the HTML part of your section. Here’s what it does:
{% schema %}
{
  "name": "Hello Section",
  "settings": [
    {
      "id": "section_heading",
      "type": "text",
      "label": "Heading"
    },
    {
      "id": "section_main_heading",
      "type": "text",
      "label": "Main Heading"
    },
    {
      "id": "description",
      "type": "textarea",
      "label": "Description"
    },
    {
      "id": "button_link",
      "type": "url",
      "label": "Button URL"
    },
    {
      "id": "button_text",
      "type": "text",
      "label": "Button Text"
    }
  ],
  "presets": [
    {
      "name": "Hello Section Layout",
      "category": "Custom Content"
    }
  ]
}
{% endschema %}
<style>
.hello-sec {
  text-align: center;
padding-bottom: 30px;
}

.view-more-btn {
  background-color: #04AA6D;
  border: none;
  padding: 15px 32px;
  text-align: center;
  display: inline-block;
  font-size: 16px;
  margin: 4px 2px;
  cursor: pointer;
}
a {
  text-decoration: none;
  color: white;
}
</style>
Explanation
- Dynamic Content: The {% if %} statements ensure that content only shows when it has been filled out. For example, if you don’t enter a heading, it won’t display anything.
- Schema Settings: The schema now includes fields for the headings, description, button text, and button URL. These fields will appear in the Shopify theme editor, so you can customize them.
- Category Change: We’ve changed the category to “Custom Content,” so your section will appear in this category in the theme editor.
3. Save and Test the Dynamic Section
Once you’ve updated the code, click Save and test it:
1. Go to your Shopify admin, click Customize on your theme.
2. In the theme editor, go to Sections tab and click Add Section.
3. Look for your custom Hello Section Layout under the Custom Content category.
4. When you select it, you’ll be able to change the content directly in the theme editor.
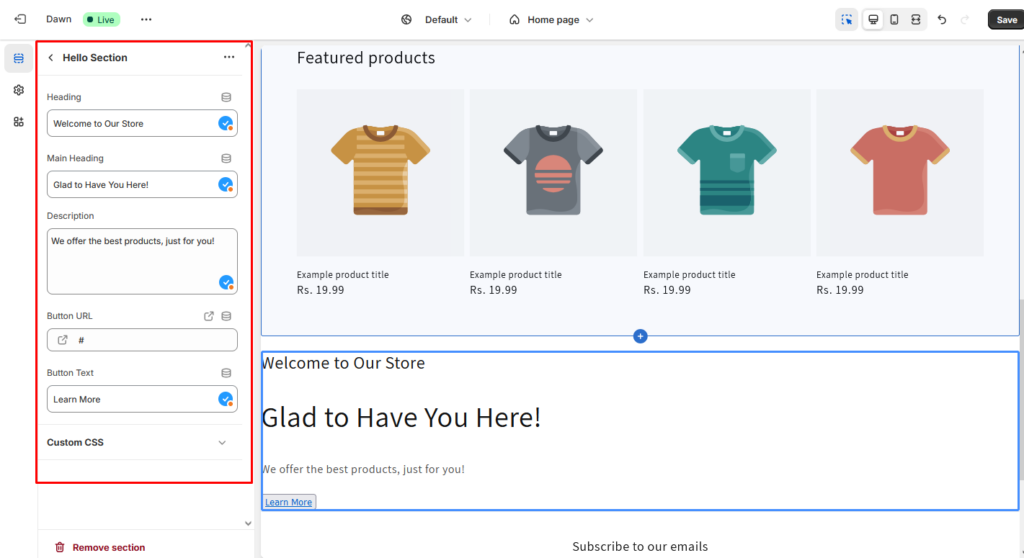
5. After making changes, save and refresh your website to see your dynamic section in action. Here is the final output of your new custom section.

Conclusion
Custom and dynamic sections in Shopify give you unmatched control over your store’s layout and content, enabling you to build a unique shopping experience that reflects your brand. By mastering these sections, you can elevate your store’s design, improve user engagement, and drive more sales.
If you need help creating custom Shopify sections or require technical assistance with your online store, our experienced Shopify developers are ready to guide you every step of the way. We will help you create custom sections, fine-tune your design, and elevate your customer experience. Contact us today to transform your Shopify store.
I am working as a WordPress & Squarespace Developer at Samarpan Infotech, My expertise encompasses a wide range of skills, theme customization, plugin integration, API Integration. I strongly believe in the motto, "Success is not the key to happiness, happiness is the key to success; if you love what you are doing, you will be successful.