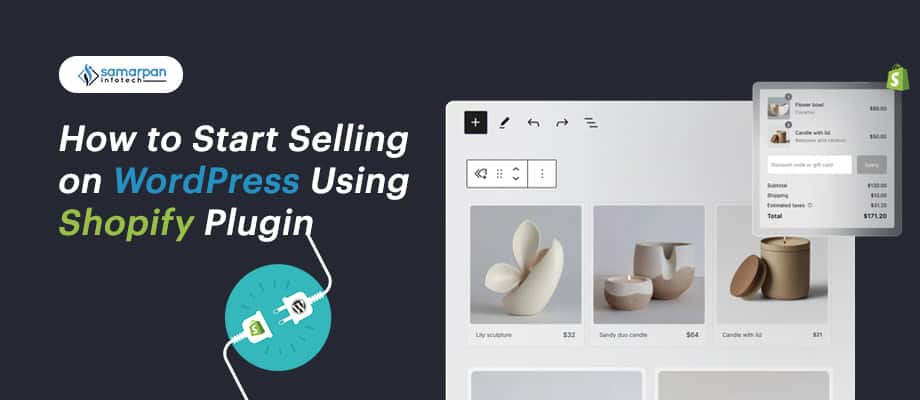
How to Create Your Shopify Store: A Simple 9 Step Guide
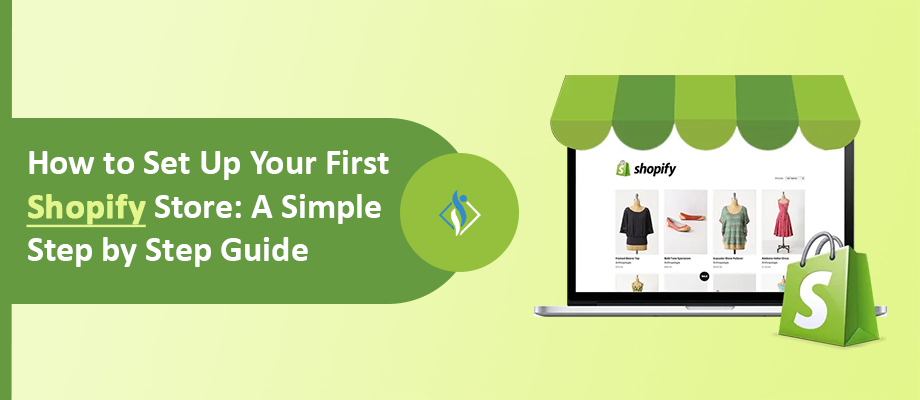

Setting up your first online store can be exciting yet overwhelming, but Shopify makes it easy for anyone to create a professional store without technical expertise. In this guide, we’ll walk you through every step of setting up your first Shopify store, from creating your account to launching your business. By the end, you’ll have a fully functional store ready to make its first sale.
9 Step to Start a Shopify Store
Setting up a Shopify store is straightforward and can be accomplished in nine simple steps. Here’s a complete guide to get you started:
1. Sign Up for Shopify
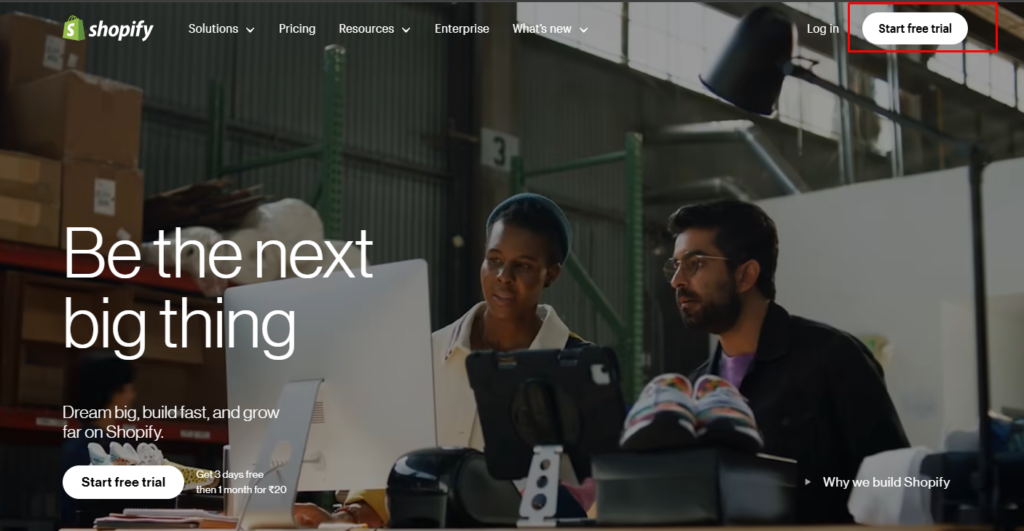
- Visit Shopify’s Homepage: Go to Shopify’s website and click on Start free trial.
- Create Your Shopify Account:
- Enter your email address, password, and store name (your store name will also be part of your URL, such as storename.myshopify.com).
- Click Create Your Store.
- Answer Shopify’s Setup Questions: Shopify will ask a few questions to better understand your business, like your location and what you plan to sell.
- Confirm Your Email: Shopify will send you a confirmation email. Click the link to verify your email address and complete the sign-up process.
2. Select a Shopify Plan
To set up your Shopify store effectively, it’s essential to choose the right shopify plan that aligns with your business goals and operational needs. This decision is crucial as it impacts your store’s functionality, costs, and overall growth potential.
- Choose Your Plan: After the 14-day free trial, you’ll need to choose a plan that fits your business needs:
- Basic Shopify – Best for new businesses.
- Shopify – Includes more advanced features.
- Shopify Advanced – For large-scale businesses with complex needs.
- Enter Payment Information: You’ll need to enter your payment details to continue using the platform after the trial ends, but you won’t be charged until the trial is over.
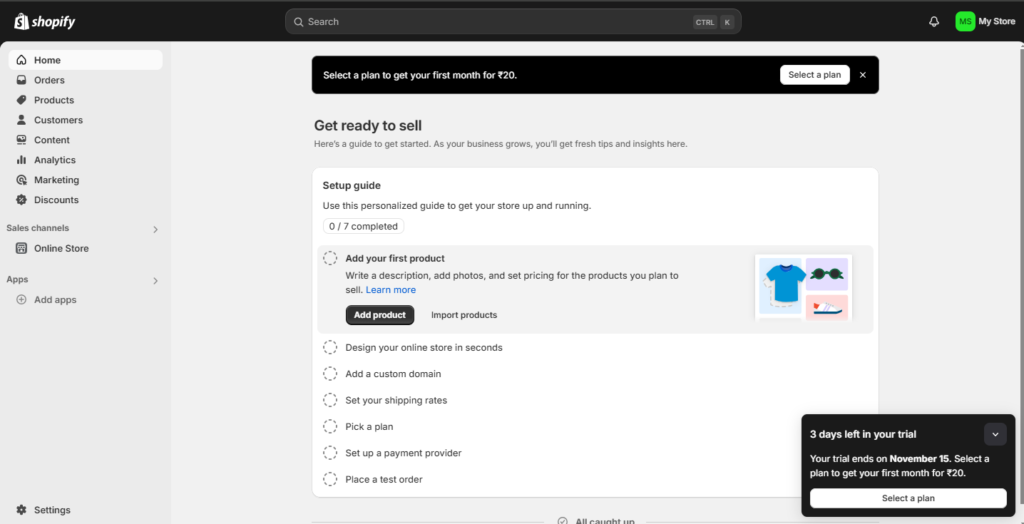
After Creating Shopify Account your Shopify Store Dashboard Look like below:
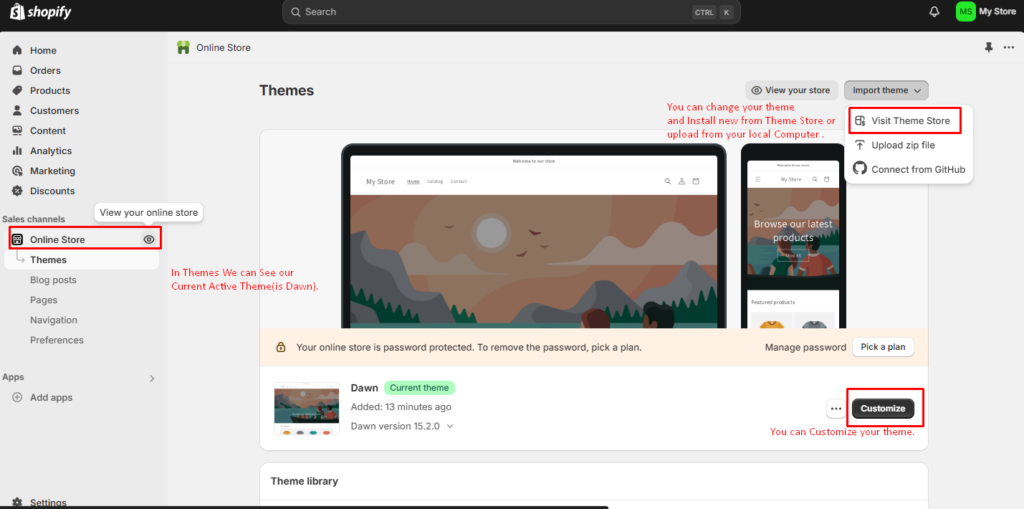
3. Choose and Customize a Theme
- Browse Shopify Themes: Go to Online Store > Themes in your dashboard. Browse free or paid themes from the Shopify Theme Store. These themes are fully customizable, even if you don’t have design experience.
- Install Your Theme: Once you’ve selected a theme, click Add Theme and install it. For this guide, we’re using the default Dawn Theme.
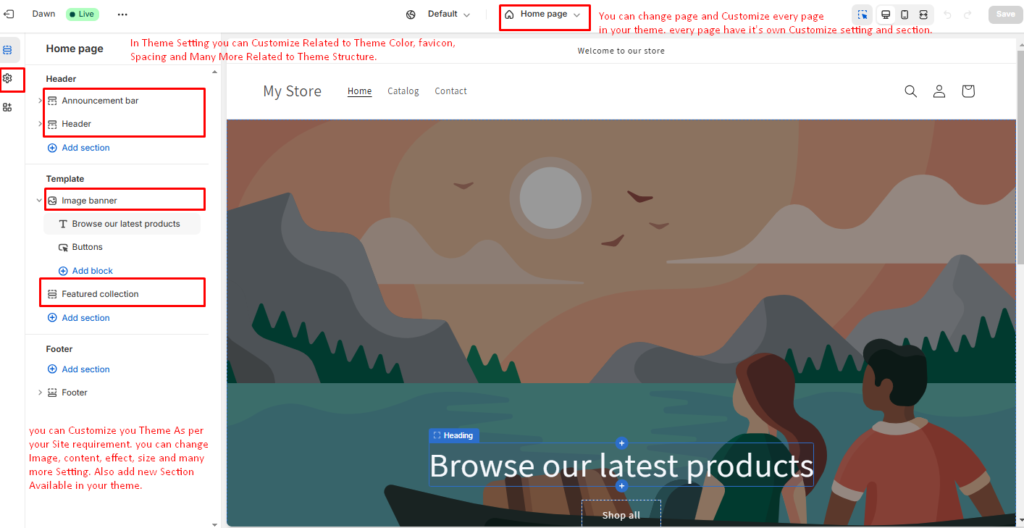
- Customize Your Theme: Go to Online Store > Themes > Customize to personalize your store. You can:
- Upload your logo and adjust colors to match your brand.
- Change fonts for a consistent aesthetic.
- Customize sections like banners, featured products, and reviews.
- Preview Your Theme: Always preview your store on desktop and mobile devices to ensure it looks great everywhere.
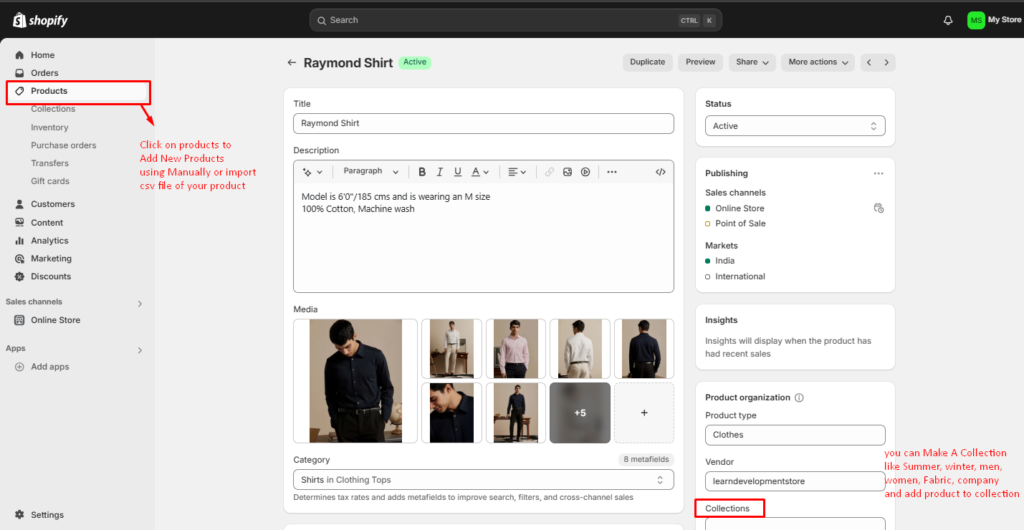
4. Add Your Products
- Add a Product: Go to Products > Add Product and fill out:
- Title and Description: Write clear, compelling descriptions.
- Images: Use high-quality photos.
- Pricing: Set the selling price and cost price (if applicable).
- Inventory: Track stock and assign SKU numbers.
- Variants: Add size, color, or other options for your products.
- Organize Products into Collections: Collections make it easier for customers to browse. For example, create a “New Arrivals” or “Sale Items” collection. Navigate to Products > Collections to set this up.
- Add Tags and Product Types: Use tags like “summer,” “men’s clothing,” or “cotton” to improve searchability on your site.
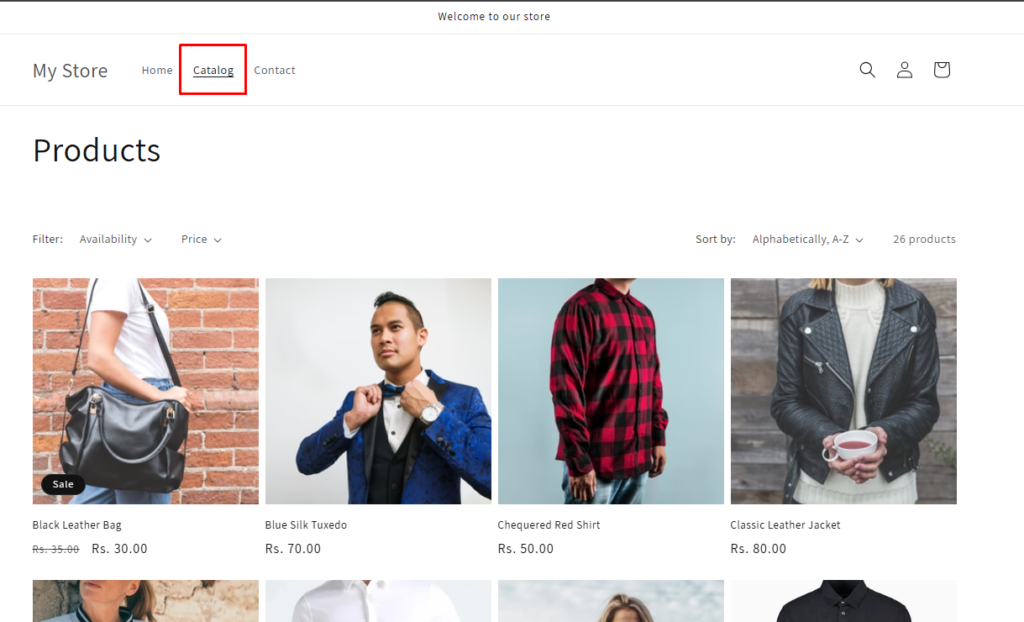
In Site Shop/Prodcut/Catelog Page Look like below:
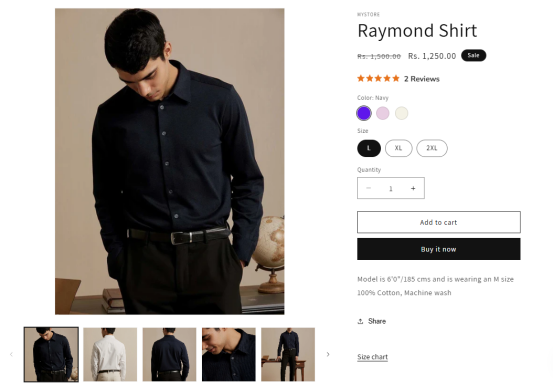
Product Single Page
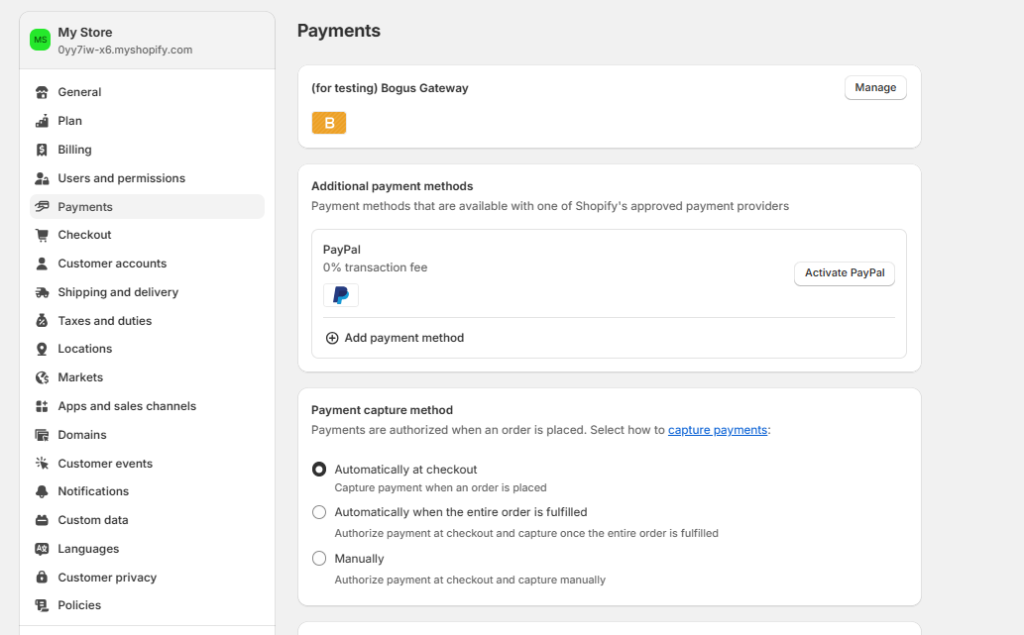
5. Set Up Payment Methods
- Set Up Shopify Payments: Shopify Payments is an easy way to accept payments directly. Go to Settings > Payments, then under Shopify Payments, click “Complete Account Setup.” Enter your business information and banking details.
- Enable Additional Payment Providers: To accept other payment methods (e.g., PayPal, Amazon Pay, Stripe), enable them in the Payments section.
- Set Up Manual Payment Methods (Optional): If you want to accept cash, checks, or bank transfers, add manual payment methods in Settings > Payments.
In our example, we used the Bogus Payment method provided by Shopify for test orders.
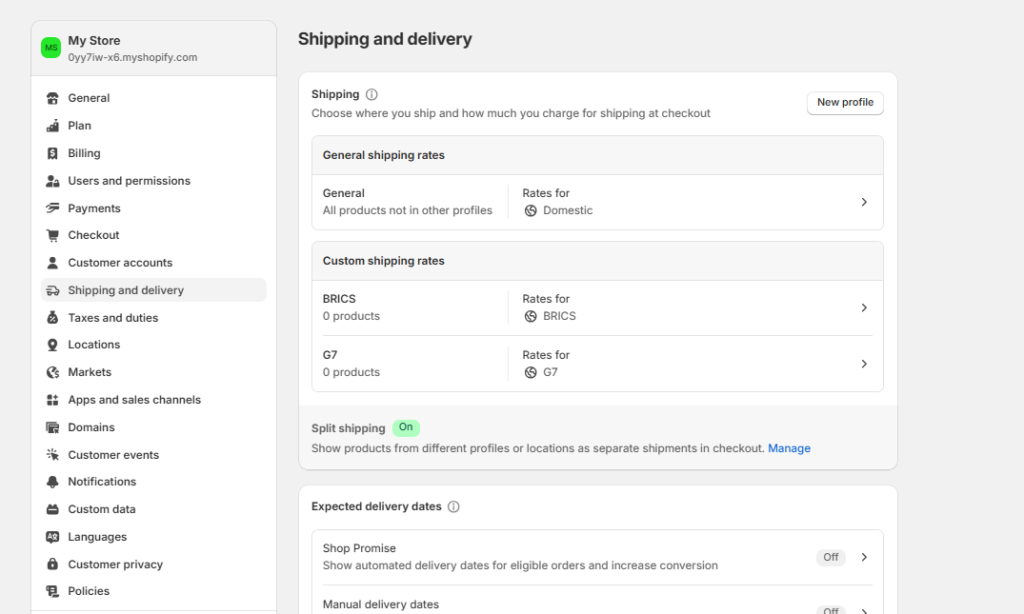
6. Set Up Shipping
- Go to Settings > Shipping and Delivery: Set up different shipping rates based on product weight, destination, and shipping methods.
- Set Up Shipping Zones: Define geographical areas where you will ship products (e.g., North America, Europe). You can set different rates for each zone based on destination.
- Configure Shipping Rates: Choose flat rate, weight-based, or price-based shipping options depending on your business needs.
- Enable Carrier Calculated Shipping (Optional): If you want real-time shipping rates based on customer location, enable carrier-calculated shipping for services like USPS, UPS, FedEx, etc.
7. Set Up Taxes
- Go to Settings > Taxes: Shopify automatically calculates taxes based on your location. You can enable tax calculation for different countries or adjust it manually if necessary.
- Enable Sales Tax for Your Region: If located in a country that requires sales tax, enable this option to comply with local regulations.
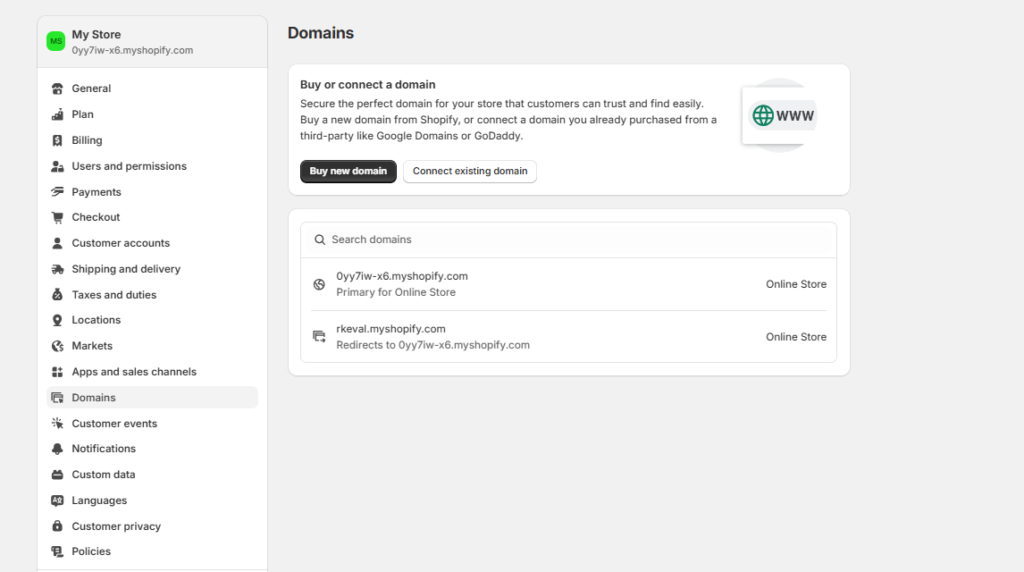
8. Set Up Your Domain Name
- Buy a Custom Domain (Optional): While Shopify provides a free subdomain (e.g., yourstore.myshopify.com), consider purchasing a custom domain for credibility. You can buy one directly through Shopify or from third-party registrars like GoDaddy or Namecheap.
- Connect Your Domain: If purchased from a third party, follow instructions from Shopify to connect it by adjusting DNS settings. Alternatively, manage your domain directly through Shopify via Online Store > Domains.
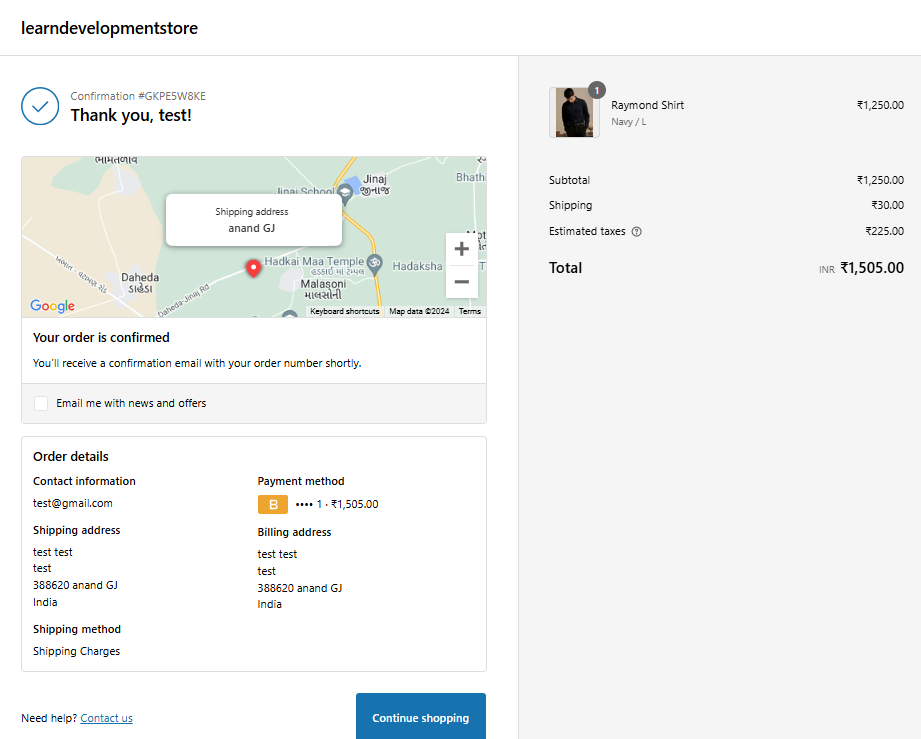
9. Test and Launch Your Store
- Preview Your Store: Before launching, preview your store by clicking “Preview” from the theme customization page. Test the checkout process and review product pages on all devices.
- Run a Test Order: Use the Bogus Gateway in Shopify to place a test order ensuring checkout and payment systems function properly.
- Remove Password Protection: If password-protected during setup, go to Online Store > Preferences and disable it to make your store live.
- Launch Your Store: Once everything is set up correctly, you’re ready to launch! Share your store on social media or through email marketing campaigns if you have one planned.
Note: In the Shopify Free Plan, you cannot complete an order at checkout; we used the Bogus Payment method for testing purposes.
Conclusion
Finally, you’ve successfully set up your first Shopify store! You’ve taken important steps to establish an online presence and reach customers worldwide. Remember, launching your store is just the beginning. Now, focus on attracting visitors through marketing, optimizing your product listings, and engaging with your audience on social media.
If you have questions or need help with your Shopify store, our experienced Shopify Developers is ready to assist you! Whether you need support with setup, troubleshooting, or advanced features, we’re here for you. Contact us today for expert help and let’s make your Shopify store a success together.
I'm currently a WordPress & Shopify developer at Samarpan Infotech, I'm passionate about web development. Beyond coding, I have a curious mind for world affairs and geopolitics, while also enjoying the occasional chess match in my spare time.